
SHOULD PLASTIC BE BANNED ??
•WHAT IS PLASTIC ?
Plastic is a material consisting of a wide range of synthetic or semi-synthetic organic compounds that are malleable and, therefore, can be molded into solid objects. Plasticity is the general property of all materials that involves permanent deformation without breaking.
•How plastic is harming biodiversity?
Plastic is harming biodiversity as it:
Impacts on species and ecosystems
All land, freshwater, and marine ecosystems are affected by plastic pollution. Natural ecosystems provide a broad range of services that are not only fundamental for conservation, but also key for economies and human well-being. For example, healthy mangroves provide coastal protection services, whereas wetlands are important for freshwater provision.
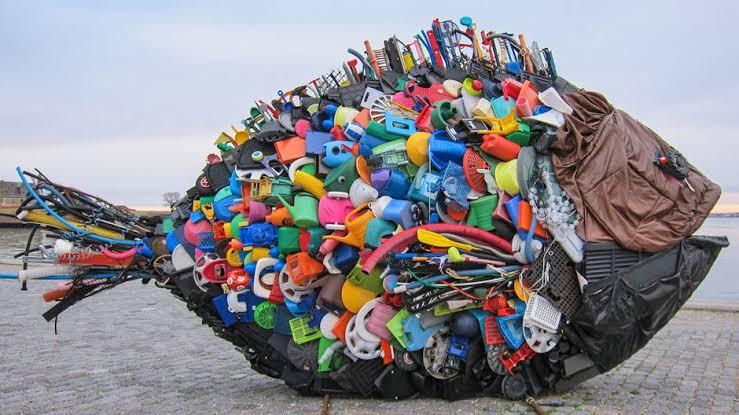
The most visible impacts of plastic debris are the ingestion, suffocation, and entanglement of species. Wildlife such as birds, whales, fish, and turtles mistake indigestible plastic waste for food and die of starvation as their stomachs become filled with it. It also causes internal and external injuries that reduce the ability to swim and fly. Domesticated farm animals are also affected by plastic pollution. Floating plastics transport invasive alien species, one of the leading causes of biodiversity loss and species extinction.
Plastic pollution can also seep carcinogenic chemicals (such as those contained in certain plastic products or fireproofing coatings) into the soil. These can run into groundwater or rivers, affecting exposed people and ecosystems.
•So should plastic be banned ?
Yes, Plastic bags are a major cause of environmental pollution. Plastic as a substance is non-biodegradable and thus plastic bags remain in the environment for hundreds of years polluting it immensely. It has become very essential to ban plastic bags before they ruin our planet completely. Many countries around the globe have either put a ban on the plastic bag or Levi tax on it. However, the problem hasn’t been solved completely because the implementation of these measures hasn’t been as successful.
•what are the alternatives?
Stainless steel
Platinum silicone
Bamboo
• Can plastic be made at home ?
yes, here are the steps -
1) Essential Items:
Milk
Vinegar
Large Pot
Larger Pot (needs to be the same size as the other, or larger).
Spoon, preferably plastic or metal
Strainer or Colander, the finer the better
Stove or other item with which to simmer milk.
Paper Towels, lots and lots of paper towels
Handy, but not necessarily essential, items:
Wax Paper (good for rolling and shaping on. Water and other liquids bead up on it for easy clean-up; also non-stick with the casein)
Aluminum Foil (good for certain types of molds)
Rolling pin (if you're going to make a flat sheet of plastic)
2: Heat It Up
I don't follow my own advice, and use full heat, because I don't want to wait.
While the milk is heating, be sure to stir it occasionally, so it doesn't burn. Also, if you're heating more than one or two cups of milk, measure the vinegar out into the cup while the milk is warming. This is personal preference, as it makes it easier to pour the vinegar in all at once, rather than measuring it out in a hurry.
During this time, you may need to pander to a needy cat, if one happens to be around.
When the milk nears boiling, you will notice a foam forming on top of the milk, as well as a little noise coming from the pot. Steam will start to appear too.
Once you reach this point, turn off the heat, pour in the vinegar, and stir. You will immediately notice chunks of casein forming. Stir it for another thirty seconds or so, for good measure.
3: Strain
Once you've poured it out (don't worry about what's left in the bottom, we'll get to that), gently shake the strainer, and swirl it around a little. Most of the casein will lump up in the bottom, pulling itself out of the holes. Make sure a majority of the liquid is strained out, but don't press it out -- the casein will just get stuck in the holes, and make it harder to get out.
Now that it's all clumped together, dump it out on some wax paper.
If you have a super-porous strainer like mine, you may want to pour the liquid through the strainer several times. Doing it a second time pulled a chunk about 1/4 as large as the original mass; that's a nice addition.
4: Sop Up the Excess
Use a few paper towels, and press gently on the casein. The liquid will spill out like squeezing a sponge. Be careful not to make it too dry, because it will become difficult to mold if it's too dry.
STEP 5: Mold!
It will take about two days to cure, but if you're using a mold where it cannot easily breathe, it will take longer.
One thing to watch out for is that the casein will warp when it's drying, especially if you have it rolled out into a sheet. It's best to put a weight on it. Watch out, though, because it will seep a milky-vinegary scented liquid into whatever is holding it in place. I used a heavy programming book...and it now has a funny smell to it. Awesome.
For my project, I just need to roll the casein out and let it dry.
Lay another sheet of wax paper over the casein. Use a rolling pin to spread it out. If you didn't dry it too much in the previous step, it should roll nicely, without many cracks or chunks.
Finally, I pressed it between two sheets of aluminum foil, and curved it across the bevel I'm using.
Give it a few days to dry, and it'll be ready to go. This is critical. Depending on how you wrap/mold your casein, you may find it takes more than a week to dry. Wrapping mine in foil took two weeks to get remotely dry. As is expected, the thicker it is, the longer it will take to dry.
I should also note that if you're making a flat piece like I am, the plastic will curl if you remove it from its mold before its dry. I made this mistake with this project, and ended up with a piece that was unusable because it curled.
The final product is quite rigid when it's thick (1/8 inch or thicker), moderately pliable when it's a little thinner, and brittle if it's paper thin. It's also sandable and paintable.